The Fear That Keeps Good Farmers Away
You have been farming organically for a year, your soil is improving and your vegetables are healthier. You are ready to get certified, whether through Participatory Guarantee System (PGS) or a third party.
Then you hear the word that stops many farmers in their tracks: records.
Suddenly, you imagine piles of paperwork, complicated spreadsheets and auditors asking questions you can’t answer.
Organic record-keeping is about telling your farm’s story using a simple notebook, a pen, ten minutes a week.
This guide will show you exactly how to set up a record-keeping system that works for a smallholder farmer.
Why Records Matter Even for the Smallest Farm
-
Records prove your integrity.
When you sell organic produce, your customers are buying trust. Your records are the evidence that you didn’t secretly spray chemicals or plant GMO seeds. For PGS groups and certifiers, records are the backbone of the entire system.
-
Records save you money.
Without records, you might buy the same input twice, or miss a pest outbreak pattern that repeats every season. Farmers who keep simple records typically reduce input costs by 15-25% within two years because they learn what works and what doesn’t.
-
Records protect you during inspections.
When an assessor visits your farm, they need to see proof. A few pages of clear, dated notes are worth more than a thousand verbal assurances.
Your Simple, Low-Stress Record-Keeping System
Below is a step-by-step system that has worked for hundreds of smallholder organic farmers across Southern Africa. You don’t need a computer, an internet connection, or any special training.
Step 1: Gather Your Tools (Cost: Almost Nothing)
- One notebook – A hardcover exercise book works perfectly. Avoid loose pages that can get lost.
- Two pens – Keep a spare. Use only one colour for consistency.
- One pocket folder or envelope – To store receipts, seed packets and labels.
- A calendar or wall chart – A simple printed calendar helps you track planting and harvest dates.
Optional: A cheap phone camera (even a basic feature phone) – you can take photos of your fields on assessment days. These serve as visual records.
Step 2: Draw a Simple Farm Map (Page 1 of Your Notebook)
On the first page, sketch a basic map of your farm. It doesn’t need to be artistic. Just include:
- Each field or garden bed, give it a name or number (e.g., “Field A – Maize”, “Garden 2 – Vegetables”).
- Water sources (borehole, river, tank).
- Buildings, compost areas and storage sheds.
- Buffer zones (hedges, strips of grass) between your fields and neighbours.
- North arrow (approximate direction).
Why this matters: Certifiers want to see that you know your land and that you’ve identified areas where contamination could enter (e.g., spray drift from a neighbour).
Step 3: Create Your Four Core Record Sections
Divide your notebook into the following sections. Use sticky tabs or simply fold corners to mark them.
Section A: Inputs – Everything You Bring Onto Your Farm
Record every time you buy, receive, or make an input. This includes:
- Seeds (organic or conventional non-GMO)
- Compost or manure (homemade or bought)
- Mulch materials
- Natural pest control products (neem, chilli spray ingredients)
- Animal feed (if you have livestock)
- Equipment cleaning agents
Simple table format (draw this in your notebook):
| Date | Input name | Source (where from) | Quantity | Cost (optional) | Used where? |
| 15/10 | Cowpea seeds (organic) | Neighbour – Maria | 2 kg | $20 | Field B |
| 20/10 | Compost | My own heap | 3 wheelbarrows | $15 | All beds |
| 25/10 | Chilli spray (homemade) | My farm | 5 litres | $10 | Tomatoes (aphids) |
Keep all receipts in your pocket folder. For homemade inputs, just note the recipe (e.g., “10 chillies + 5 garlic cloves + 1L water, boiled 10 min”).
Section B: Planting & Field Activities
Record what you plant, where and when. Also note any major activities like tilling, mulching, or applying compost.
Simple table format:
| Date | Field | Crop/variety | Seed source | Area planted | Notes |
| 1/11 | Field A | Maize – local variety | My saved seed | 0.5 ha | Intercropped with cowpeas |
| 5/11 | Garden 1 | Tomatoes “Heinz” | Bought (Living Seeds) | 10 m² | Mulched with grass |
Why this matters: Certifiers can cross-check your planting dates with harvest dates. It also helps you track which varieties perform best.
Section C: Pest, Disease & Weed Observations
This section is your early warning system. Walk your fields at least once a week and note any problems, even small ones.
| Date | Field | Problem observed | What you did | Did it work? |
| 12/11 | Field A | Aphids on cowpeas | Sprayed soap solution | Reduced by 80% after 2 days |
| 15/11 | Garden 1 | Cutworm damage on seedlings | Hand-picked at night; placed collars | No new damage |
This is your learning diary. Over time, you will see patterns: “Aphids always appear in November.” Then you can prepare earlier.
Section D: Harvest & Sales
Record what you harvest and what you do with it.
| Date | Crop | Quantity harvested | Sold? (where, price) | Family use | Given away |
| 15/2 | Maize | 200 cobs | 150 to market @ $55 each | 40 | 10 |
| 18/2 | Tomatoes | 50 kg | 30 kg to restaurant @ $15/kg | 15 | 5 |
If you are certified PGS or third-party, you must be able to trace a product from your field to the customer. This table does that.
Step 4: Keep It Simple – The 10-Minute Weekly Routine
You don’t need to write every day. Set aside 10 minutes every Sunday evening to update your notebook.
- What you did this week (planting, spraying, harvesting).
- What you bought or made.
- Any pest observations.
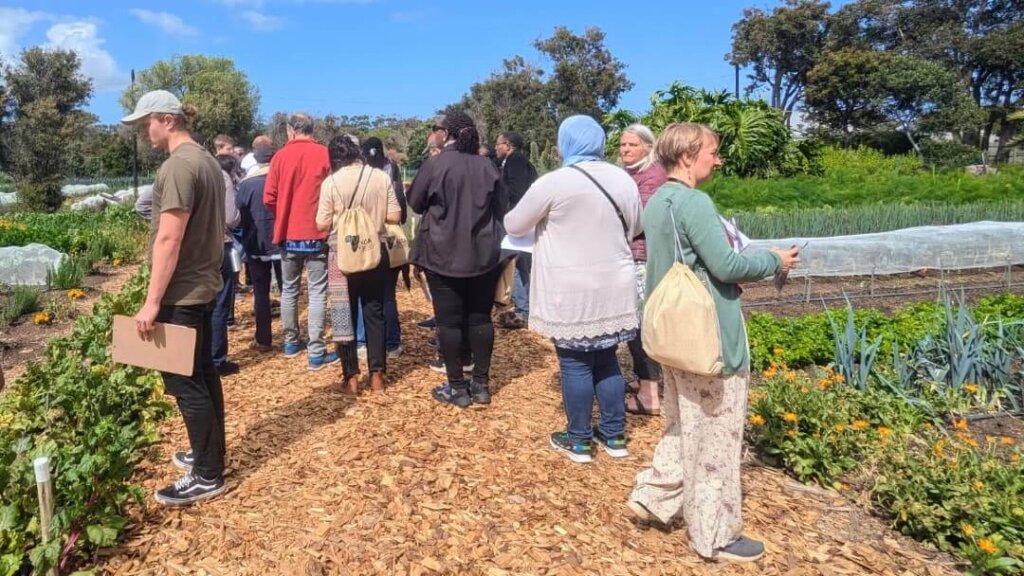
Step 5: Prepare for Assessment Day
When your PGS team or certifier visits, they will want to see:
- Your farm map.
- Your input records (especially to confirm no GMOs or prohibited chemicals).
- Your planting and harvest records.
- Any receipts for bought inputs.
Do not panic. The assessors are not looking for perfection. They want to see that you are trying and that you have a system – even a simple one. If you miss a few entries, just be honest. Say: “I forgot to write that week, but here’s what I remember.”
What happens if records are missing?
The certifier may ask you to clarify, or they may schedule a follow-up visit. Very rarely, missing records can delay certification. That’s why the weekly 10‑minute habit is so valuable.
Be Part of the Solution
The future of Southern Africa’s food system is in our hands.
Download Your Free Guide: “Basic Production Principles – SAOSO/KHSA“
Get the full framework for building climate-resilient farms through organic soil, water and crop management.

Author: Rabecca Mwila
Rabecca Mwila is a passionate advocate for sustainable agriculture and environmental stewardship. With a background in climate change and communications, she has spent years telling the untold stories of the realities of climate change, environmental and climate injustices and how they affect vulnerable communities in Africa and beyond